
As part of our migration from Heroku to AWS we wanted to migrate our React.js web apps away from Node.js application servers to performant (and cheaper) static web object stores backed by a CDN.
Our goal was to achieve integration with our CI/CD system. We wanted our continuous integration tests and deploys to run via CircleCI, get pushed to S3 and then get served to the world via AWS's CloudFront CDN service.
Setting up up S3 + Cloudfront + HTTPs was surprisingly simple, taking no more than 15 minutes but...it did require some digging across a number of documents to understand the whole solution.
Our intended setup is to have our web app named brring-web-client-development served from https://app.dev.brring.com.
Setup a static website on S3
To get started from the S3 console click on Create bucket then choose your bucket name - our example is brring-web-client-development.
Choose your preferred Region. Whilst our final CloudFront backed solution will be globally served, S3 buckets are regional and pricing varies accordingly - we chose to use the cheapest us-east-1 region.

Configure any options you feel you might need like Server access logging or CloudWatch.
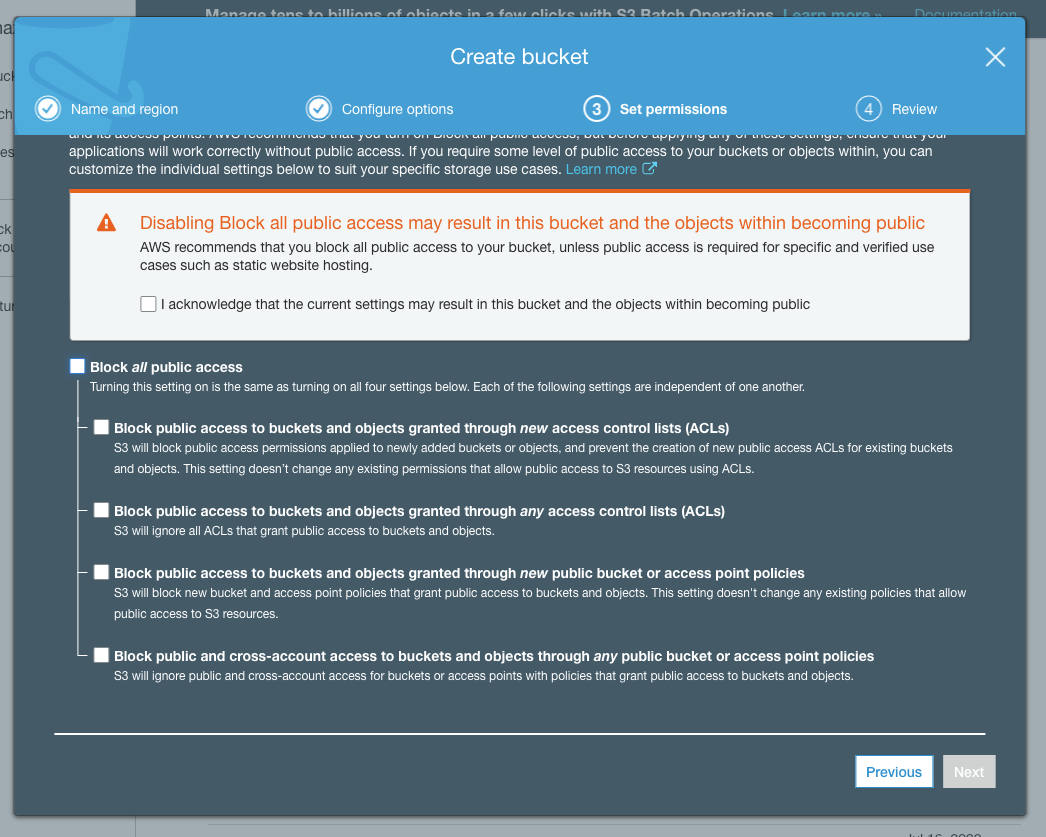
Under Set permissions unselect Block all public access, we'll lock down the permissions using a Bucket Policy later:
Select your newly created bucket, then go to Properties > Static Website Hosting then select Use this bucket to host a website.
Set your Index Document, which for us is index.html and if you have one set your Error Document. We're using index.html in both cases since our web app handles errors within the app.
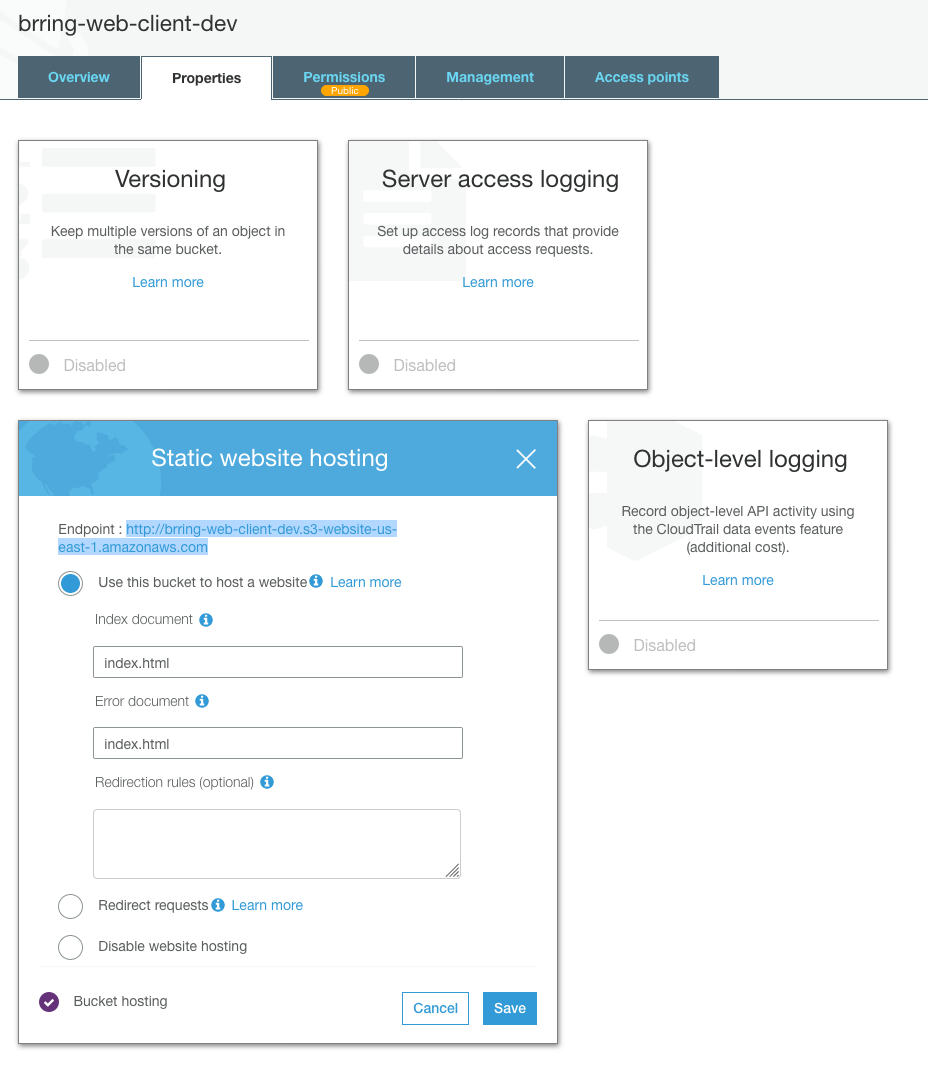
From here make a note of the Endpoint URL for your Static website, you'll need this to configure CloudFront. This URL is the Amazon S3 website endpoint for your bucket and is not the same as the S3 bucket URL, you can read up on it on the AWS official docs page.
To allow public access to your site (so others' can see it) navigate to Permissions and then Bucket Policy and copy and paste the below to allow read access to the world. Be sure to set brring-web-client-development to the name of your bucket
{
    "Version": "2012-10-17",
    "Statement": [
        {
            "Sid": "AddPerm",
            "Effect": "Allow",
            "Principal": "*",
            "Action": "s3:GetObject",
            "Resource": "arn:aws:s3:::brring-web-client-development/*"
        }
    ]
}
For more advanced setups you can generate a custom policy at the AWS Policy Generator.
Once done click Save.
Next push your website to S3. You can do that from the S3 console via Overview > Upload.
Obtaining a SSL certificate for HTTPS from ACM
Next we want to obtain a certificate for our website domain. To do this we'll use AWS Certificate Manager (ACM).
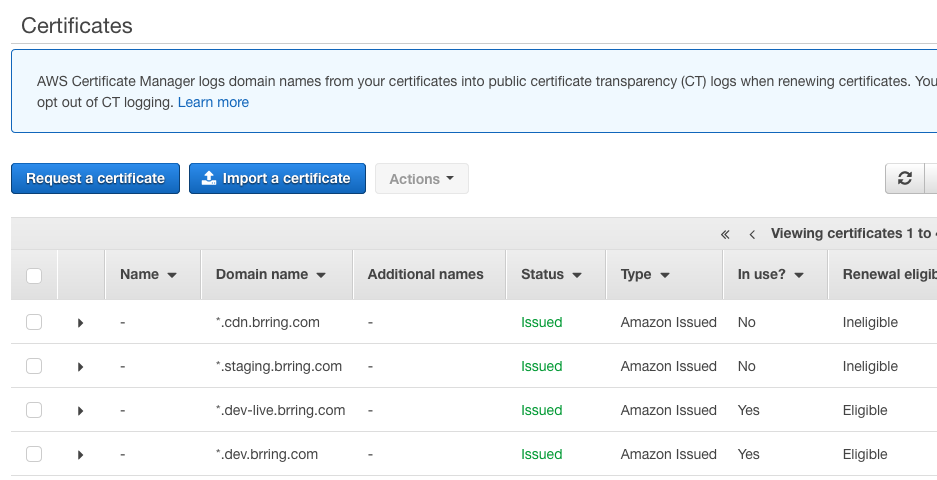
First click on Request a certificate, then enter your domain name. This can be a wildcard certificate in the form *.mydomain.com or for a website would be mydomain.com whereupon click Add another name to this certificate and add www.mydomain.com as well to provision the certificate for multiple domain names. In our case we want *.dev.brring.com.
Choose DNS validation in the next step. Once you're happy Confirm and request your certificate and copy the DNS entries, in our case they were:
- Name:
_1234abc.app.dev.brring.com. - Value:
_789fgj.asdjwqeaa.acm-validations.aws.
We now need to create a CNAME DNS record to verify ownership. Since we're using an external DNS provider for our Name value we don't want the whole entry for Name, we just need _1234abc.app.dev.

Once the entries are created at the DNS registrar we should see the certificate Status show as Issued within ACM within an hour.
CloudFront
With our newly minted certificate, hop over to the AWS CloudFront dashboard.
Click on Create Distribution then under Origin Settings set Origin Domain Name to the entry you copied from your S3 Static Website Endpoint earlier. You need to use this Endpoint not the bucket name.

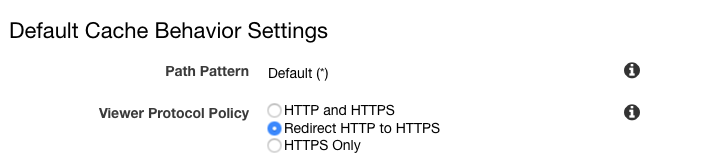
Under Default Cache Behavior Settings set Viewer Protocol Policy to Redirect HTTP to HTTPS:
Also set Compress Objects Automatically to Yes:

Next under Distribution Settings you'll want to set your Alternate Domain Names, for example mydomain.com and www.mydomain.com.
To choose your new SSL certificate select Custom SSL Certificate then choose your certificate.

Finally click on Create Distribution and once you see your new CloudFront distribution copy its Domain Name, we'll be using that to point the DNS records at your registrar to your new CloudFront distribution.
DNS
In your domain registrar's DNS management console simply add a CNAME with your domain name eg. for a website we'd create two CNAME records:
www CNAME d12345678.cloudfront.net
@ CNAME d12345678.cloudfront.net
Whilst you can point your www CNAME to your @ CNAME it's best practise to avoid multiple redirects so stick with both CNAME records pointed at your CloudFront domain name.
In our case though we just need:

And with that done give it some time for your DNS records to propagate and fire up your URL https://app.dev.brring.com and enjoy a CDN distributed HTTPS secured S3 static website.


